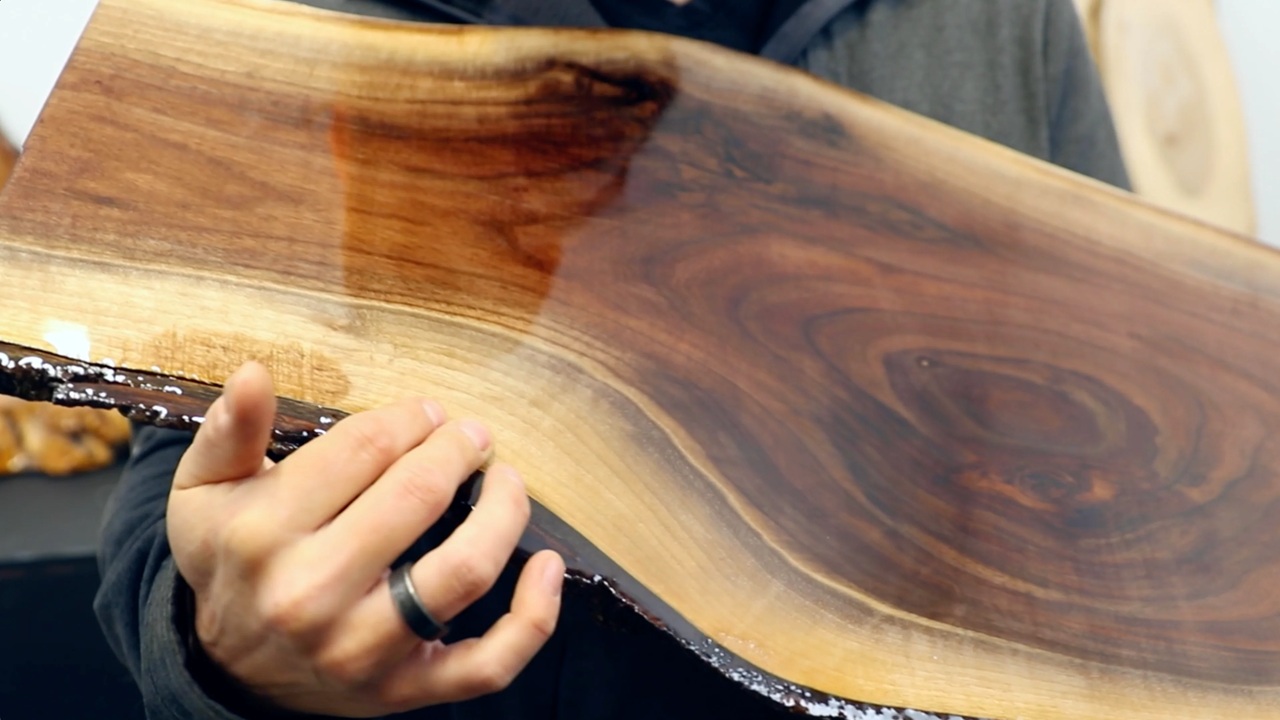
Wood projects acquire extended durability and aesthetic improvement after being coated with epoxy resin. The clear epoxy resin from Bond Craftor offers a complete protective shield that creates gleaming surfaces that are resistant to scratches and moisture and are normal for daily use. The application of clear epoxy resin for wood through sealing acts as an improvement for wooden piece durability because it also makes decorative wooden items like signs and river tables look better.
Preparing the Wood Surface
Any application of Bond Craftor Clear Epoxy Resin requires wood surfaces to maintain complete dryness with no dust while being devoid of imperfections. The resin experiences problems when dust, dirt, or grease is present on the surface. A smooth wood surface can be obtained by sanding the wood with fine-grit sandpaper. Wood filler should be used to repair cracks or holes before the surface gets properly sanded after drying. A thin epoxy seal applied to the wood surface will stop bubble formation when dealing with the final resin coat. The porous nature of wood allows it to hold trapped air, which subsequently produces bubbles in the resin. Using a thin protective coat will stop the loss of air through wood pores.
Measuring and Mixing the Epoxy Resin
Both epoxy resins have resin and hardeners as their separate components. Both parts of Bond Craftor Clear Epoxy Resin need to be combined at a ratio of 1:1 for proper mixture. Proper measurement of the resin ratio proves vital because improper ratios will lead either to sticky resin or improper curing. The measured epoxy resin components need to be added carefully into a clean mixing container, where they should be combined at a slow pace. The appropriate way to mix epoxy resin requires a gentle motion for three to five minutes until you attain a precise and uniform consistency. Judicious use of a scraper during mixing enables you to mix all ingredients well throughout the container.
Pouring the Epoxy Resin
When the mixing resin is complete, the user needs to pour it instantly onto the wooden surface. Excessive waiting duration before application produces thickening of the substance. To distribute the resin evenly throughout the wooden surface, you should add it to the middle part, followed by application with a brush or spreader, or by using your gloves. The best pouring method for thicker resin layers happens by layers, such as river tables. Each development of the epoxy resin layer needs sufficient time to cure before adding additional layers. The method prevents overheating that leads to both cracks and bubbles in the resin material.
Removing Bubbles from the Resin
Mixing the resin carefully does not eliminate bubble formation during the process. The use of a heat gun coupled with a torch will eliminate any bubbles found in the resin material. A fast motion of the heat source over the surface will cause bubbles to rise toward the surface for their eventual breakdown. A hairdryer with its temperature set to low heat functions as an alternative to heating guns or torches for bubble removal from resin. The distance between the heat source and resin should remain ample because close contact might generate crude curing along with scorch marks. A successful approach for resin surface movement includes maintaining a balance distance of two to three inches.
Allowing the Resin to Cure
Curing the resin requires a period. The complete curing process for Bond Craftor Clear Epoxy Resin lasts between two and three days under normal temperature and humidity conditions. Placing the curing process in a protected space free from dust is essential to stop dirt from entering the vulnerable resin. The application of clean plastic material or a box over the project works as a preventive solution against dust deposition. Maintain the project area inside a space which offers good ventilation while maintaining temperature constancy.
Sanding and Polishing the Finished Surface
After the resin has been fully cured, the material might present surface imperfections along its edges. The finishing process requires fine-grit sandpaper that dissolves irregularities from the wood surface. A soft cloth, together with resin polish applied to the surface, will create an extra shine for a high-gloss appearance. A tabletop formation achieves a glass-like appearance through the application of resin as the concluding layer. The additional finish coating serves an optional purpose in attaining professional aesthetics.
Conclusion
Clear Epoxy Resin from Bond Craftor provides wood projects both protection and enhanced appearance. Expert curers and proper preparation methods together with precise mixing will lead to professional finishes that develop after the curing period. The use of epoxy resin creates a durable and attractive surface on wooden tables as well as river tables while also adding gloss to handmade signs which maintain their beautiful appearance.